Engagement and wedding photography had quite a change from when I was young and in love. My photographer cut out the heads of the guests from a reception photo and made me a collage and glued them to a piece of wallpaper! It makes me laugh just to write those words. Cameron and I and our parents stood side by side and had our photos taken in the church. Historically they are fun to have but none of them are nice enough that I would want to frame them. I would frame any of Jon and Brittney's engagement photos!
Since I don't know who is reading this blog for news on the wedding or who is interested in watching Brittney's dress being created, I will try to write a little bit about both in each entry. If you are a sewer you might enjoy this next passage, if you're not...then not so much. Anyway take what is useful or interesting and don't worry about the rest.
Now for some technicalities....I decided today that muslin sucks! So today I finished up creating a bodice from the thrifted wedding gown that I bought at the Goodwill. This weight is a much closer weight to the silk that I will be using. I used the muslin I had left over for the lining. I'm pretty tickled with the results.
I had never done any boning so this is something that I had to learn. I did some research and
discovered that they used to use actual whale bones in corsets and gowns...how neat! Wherever the fabric might droops you put in a plastic bone. It’s a
little bit like tent pole. Droopy tent
add a pole.
To start with I put boning in the princess seam from neckline
to waist. I also plan on putting it on the sides and in the back and maybe in the center front.
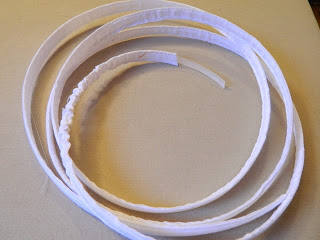
Here I’ve pushed out the plastic bone so you can see the two
pieces.
I measured and cut the lengths that I wanted and then pulled
the
bones out completely. I sewed the channel onto the princess seam.
bones out completely. I sewed the channel onto the princess seam.
dimensional. This is a photo of the bust and the arm opening.
I did the same thing on the other side. This is the inside of the
bodice and when it is finished this will all be hidden. You can
get a pretty good idea how the boning fits over the bustline.
bodice and when it is finished this will all be hidden. You can
get a pretty good idea how the boning fits over the bustline.
LESSON: As always I learned that you can teach an old dog (me)
new tricks, putting bones in is a piece of cake and actually kind of fun.


I am enjoying your wedding dress blog. What an incredible seamstress you are!
ReplyDeleteAnd a great person, too!
ReplyDelete